If you’re anything like me, every so often you wake up with an irrepressible craving for an indulgent beverage from that trendy café down the block. It’s eye-roll inducing, but you can’t help it. You might play mind games with yourself, thinking, sure, I *could use my roommate’s hand-me-down drip machine and Chock Full O’ Nuts, or… I could splurge on a $6 elixir of the rich, energizing goodness that I truly deserve.*
Clearly, your decision is already made. You are going to buy that fancy cup of coffee and you will file away your guilt and enjoy it thoroughly. But what if you could recreate the café experience at home, saving a bit of cash and becoming something of a coffee connoisseur in the process? With this in mind I met with Sean English, co-founder of Unity Sourcing & Roasting, to walk through a few simple ways to up my coffee-brewing game.
Unity sources coffee beans fairly and sustainably from across the globe and roasts them at home in Bushwick. Their ethos is about partnering with farmers and importers that produce quality coffee while investing in their communities. “Coffee farmers are often the main source of income for their regions, so they have to be leaders,” Sean explained. “One of our flagship coffees, Girma Eshetu, is from Ethiopia, and the farmer is working on building windmills, solar panels and electric water pumps in his community. That’s what we want to support.”
Unity aims to encourage consumers to not only deepen their understanding of where coffee comes from, but also to realize that “good” coffee can be accessible to anyone and made in many different ways. Sean and I holed up in his Astoria apartment on a chilly morning to play around with three apartment-friendly methods for brewing a satisfactory cup.
First, the basics
At the beginning of our conversation, Sean asserted that there’s no one-size-fits-all formula for making the perfect cup of coffee. Sorry to disappoint, but he made a solid argument: coffee preferences are extremely subjective. Some people believe that an iced sugar-free caramel macchiato from Starbucks is the crowning achievement of the industry. Some are addicted to bodega coffee; others can’t stand it. Professional standards do exist, but it’s up to you to decide what you like and how you like it — “Different strokes for different folks,” in Sean’s words. When you make coffee at home, you have the power to control parameters and try new things.
In order to begin, a few things to have in your kitchen are:
A grinder. Buying whole instead of pre-ground beans gives you flexibility to play with flavor, intensity, and brew method. To grind whole beans with ease and speed, Sean recommends an electric over a hand grinder, but both work. It might be worthwhile to invest in a model like this Baratza one, or you can opt for an affordable hand grinder by Hario. If you care to evaluate the merits of flat burr versus conical grinders, see here.
A hot water kettle. You’re going to have to pour hot water into a brewing vessel, which is easiest using a stovetop or electric kettle.
Optional: A scale. According to Sean, “It’s not necessary but is helpful, especially when you’re trying to learn about coffee. Weight is a meaningful metric because beans have different densities.”
Buying coffee
To my surprise, Sean wasn’t keen on explaining what kinds of coffee to buy for maximal enjoyment. I pressed him on it and he explained his philosophy: “We’re often told what is supposed to taste good. Starbucks has a stranglehold on ‘specialty coffee’, and they define flavors and blends. But our approach is not to tell people what’s best. I don’t think that benefits anyone.”
His advice for choosing coffee is fairly straight forward. “Start buying different coffees and decide what you think is good. Ask the person at the store to give you ideas, but not to tell you exactly what to buy,” he said. “Coffee plants differ based on regional factors, similar to wine — we just don’t talk about coffee in the same way. For example, one popular varietal is called the ‘geisha.’ It’s a beautiful varietal, but just because someone serves you a geisha doesn’t mean it’s good. Not every batch is the same.”
In addition to the roast, sometimes a bag of coffee lists its level of acidity. I avoid acid because of the connotation of the word, but Sean debunked my misconception. “It’s the type of acidity that matters,” he said. “Does it taste fruity and vibrant like a sugary orange? Or is it like I’m eating straight lemon peel? Sourness can have to do with how you brew or how fine the grounds are, not just the acidity of the beans.” Moral of the story: experiment and you shall discover.
Brew methods
We reviewed three techniques, from simple to modestly complex: french press, pour over, and AeroPress. Each method offers a different level of control and entails its own process of “extraction,” which is what happens when you pour hot water over grounds — the water draws out the flavor and caffeine.
One element that remained consistent was water temperature. Though you can switch it up, using a consistent temperature allows you to focus on other parameters. Sean has found his sweet spot: “I don’t bring the water all the way to a boil — I set my kettle to 204 degrees Fahrenheit. But if you just want to put a kettle on and not think about it, let it boil.”
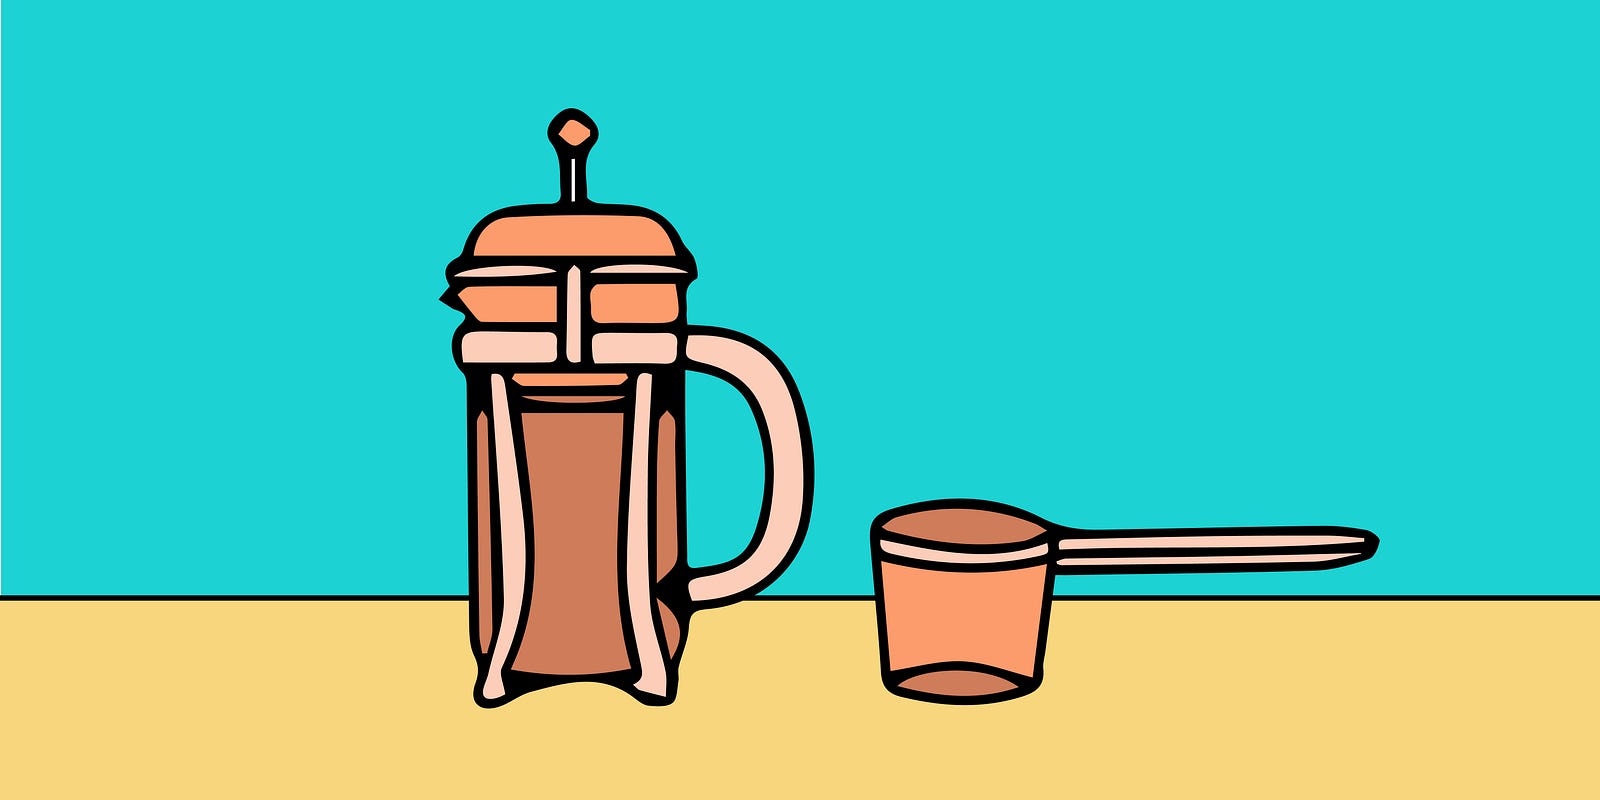
1) French press
This is a basic method that allows you to retain more control over the outcome than you would with a Keurig or drip machine. Sean uses a Bodum french press, which can be found at almost any grocery store or home goods retailer.
Grind: Always use a coarse ground for a french press. “If you run your fingers over a fine versus a coarse ground, you can tell the difference even if you can’t see it,” Sean explained. “It’s best to touch the grounds and know if it’s the right texture.”
Water: coffee ratio: Sean’s french press makes about two cups of coffee and comes with its own scoop. Each scoop holds about 0.25 ounces or seven grams of coffee, and Sean uses six. Rather unscientifically, he pours hot water in until the grounds reach the metal bar at the top of the press. Then he stirs and lets it sit for about a minute before putting the plunger in.
Brew time: Sean typically waits four minutes before pressing the plunger all the way to the bottom of the vessel. “No need to be exact, but staying within about five minutes is best to avoid an over- or under-extraction,” he said.
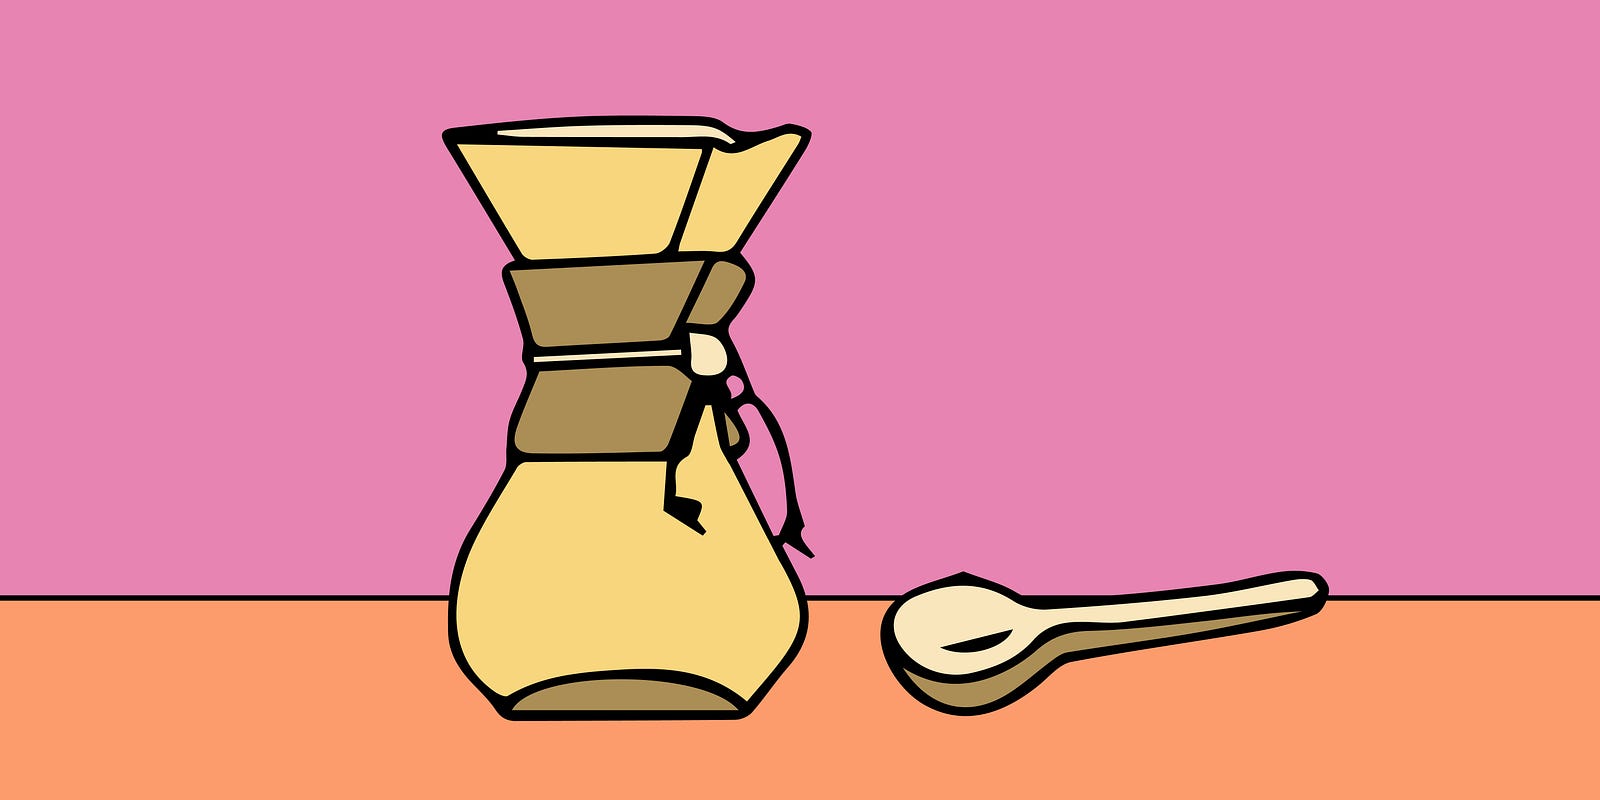
2) Pour over
Sean uses a Chemex, calling it his “go-to brewing method”. They come in a variety of models and sizes, but Sean’s makes about two large cups. This method requires a filter for the extraction process — you can buy recycled paper and cloth filters, or even better, grab an eco-friendly stainless steel one.
Once you’ve selected your tools it’s time to start testing parameters. “The Chemex really allows you to see what causes certain results,” Sean said. “For example, if you’re using a fine grind the extraction might be slow, which can lead to sourness or chalkiness. Or if it pours through quickly, it’s probably too coarse which creates a watery, bitter taste.”
Grind: Your grounds should be medium coarse (a bit less coarse than the french press).
Water: coffee ratio: Sean uses the about same amount of coffee for his pour over as as he does for the french press. However, you can decrease if you don’t want a dense flavor, or add extra for more richness. Pour the water gradually in a circular motion to ensure equal saturation. Pro tip: Sean pours some water through his filter before adding grounds to get it wet and heat the carafe. He then transfers the water into his mug to warm it up — a simple step that boosts the experience.
Brew time: This factor isn’t as relevant for a pour over, but Sean uses a timer to see how long the extraction takes and how it varies day by day. Just for fun!
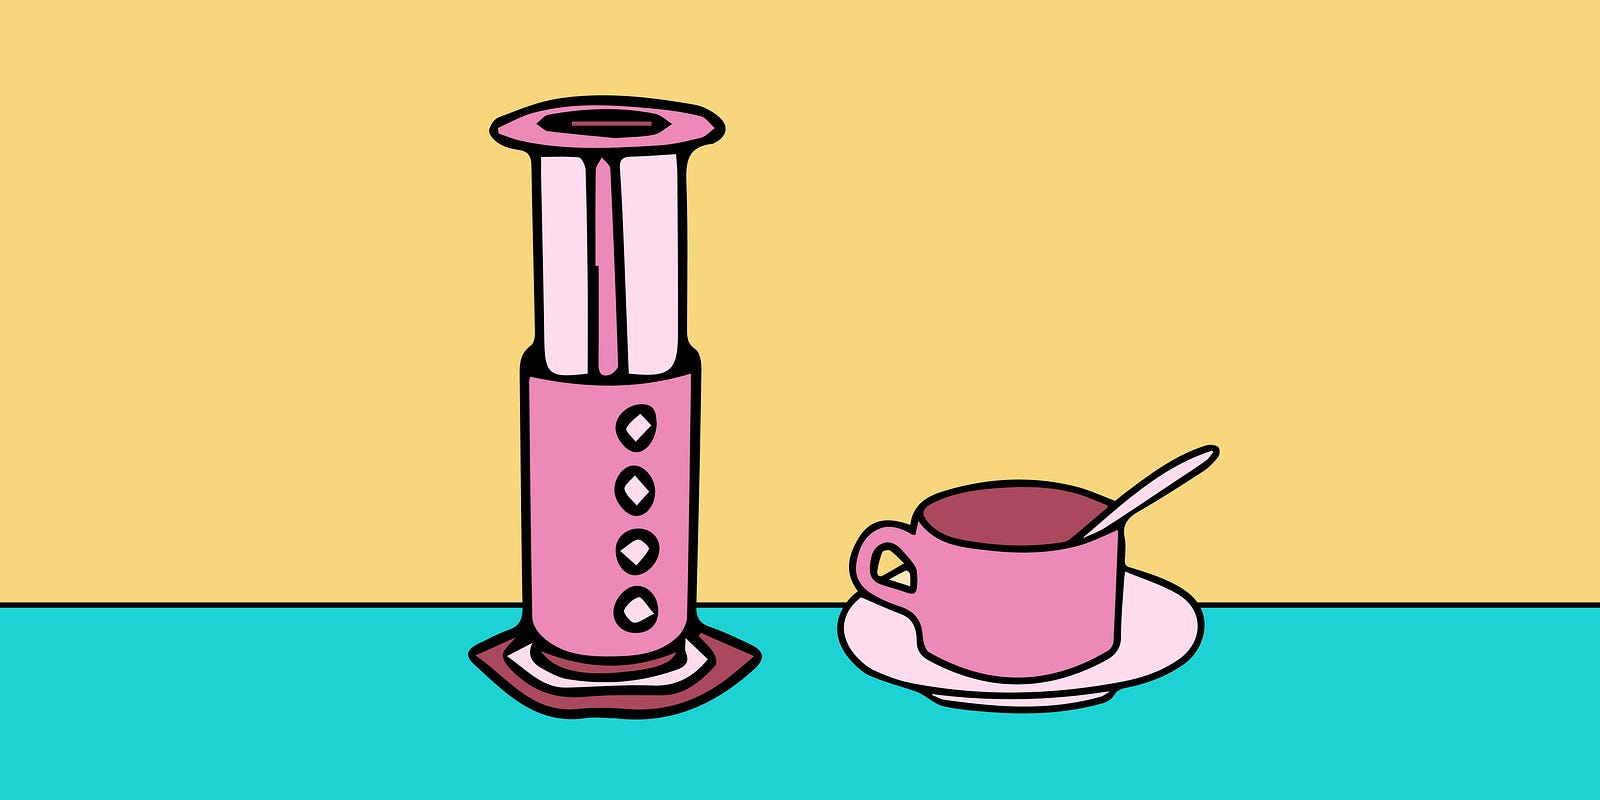
3) AeroPress
The AeroPress is relatively new compared to other tried and true options, but it’s become all the rage in the coffee community over the past few years. Sean loves its versatility — “You can even make a cheater espresso, so it’s great if you don’t want to buy an espresso machine.”
The AeroPress mechanism essentially creates a vacuum chamber for the grounds and water. It creates a pressurized extraction, which is why it’s super fast and you can make espresso-esque drinks with it. Science!
Grind: For a cheater espresso, use a very fine grind — “almost like beach sand.” Sean uses the finest setting possible on his electric grinder.
Water: coffee ratio: The AeroPress comes with a few proprietary tools, including a paddle for stirring and a scoop. For his espresso, Sean uses two of these scoops of coffee. He then pours hot water in until it’s halfway between the 1 and 2 markings on the AeroPress, amounting to about two ounces of coffee (a double espresso). For a full cup, you’d fill the vessel all the way. Once the water is in he stirs the top to break up the grounds and inserts the plunger.
Brew time: With the grounds saturated and the vacuum sealed, Sean waits about three minutes and before pushing the plunger down and releasing the coffee into the cup. This method creates a concentrated consistency, which Sean described as “tight and dense with extra brightness.” If it’s too much for you, pour a little bit of extra hot water over your finished cup and the flavor will “open up.”
I walked away from my morning with Sean both highly caffeinated and highly enlightened. If you glean one thing from this article, it should be that making coffee at home can bring you just as much joy as buying it at a coffee shop — just takes a few extra steps and an open mind.
Do you have coffee making tips to share? Let us know on Facebook, Instagram, or Twitter!
All illustrations by Chumi Gonzalez.